Contents:
Issue
The EI Inverter log is reporting the following message: Error Code 201 - Residual Current High
The detection and presentation of this Error Code informs the installer of any wiring issues that may cause damage to equipment and reduce the risk of serious harm (from electric shock).
Disclosure: Injury may still occur in some cases. For example:
- if a person receives a brief shock before the electrical circuit is isolated
- if the person touches both conductors at the same time.
- If a person falls or loses their footing, after receiving a shock
There may be some unfamiliar terms in this procedure. For this reason, it is highly recommended that you read this article before proceeding: PV Array Ground Fault Troubleshooting
Possible Causes
Issue with DC wiring, possibly due to:
- Short Circuit from insulation damage (such as bare wire, or pinched wiring).
- Moisture/condensation (in connectors or wiring boxes).
Troubleshooting
⚠️ WARNING: Any troubleshooting attempts must be performed by a qualified solar installer!
Step 1. Completely de-energize system
- Turn off all components, as well as the AC Grid power:
1. Turn OFF Battery. 2. Turn OFF the Inverter power switch and external DC disconnect (if applicable). 3. Remove A/C Grid power by cutting the main breaker (at the panel) or by engaging the AC disconnect.
-
⚠️ CRITICAL: Verify that the system has been de-energized!
Always take the proper steps to ensure the installer's safety while conducting these tests.
Use a multimeter to verify the following Inverter measurements read:
- GRID/BACKUP terminals
L1 and L2 should read 0V AC.
- GRID/BACKUP terminals
L1 to N and L2 to N should read 0V AC.
- Battery positive-to-negative terminal
Should read 0V DC.
- GRID/BACKUP terminals
Step 2. Check inverter grounding conductor screw tightness
Measure the torque of the grounding conductor screws. See the terminal strip surrounded by the red rectangle in the screenshot (below):
- Ensure the inverter's wire connection to the Grounding Electrode Conductor (GEC) is tight enough and torqued on the internal grounding bar to: 1.0 Nm (as a minimum). Make sure the wire(s) are not corroded.
-
Electrical (load center) screw check:
Verify tight enough screw(s) for the Grounding Electrode Conductor (GEC) on the- GROUND BUS BAR
- GROUND LUG
by measuring the torque while tightening.
(always follow the load center torque specifications label).
-
Verify proper tightness by measuring the torque required to move the on-inverter external GEC screw (if used):
Question:
Did the Inverter torque specifications match the installer terminal torque checks?
• If YES - Continue to Step 3.
• If NO - If torque was corrected, then proceed to Step 6 - System Turn On.
Step 3. Check PV grounding conductor integrity.
⚠️ WARNING: Even with the PV DC-disconnect off, there may still be lethal voltage in the DC wiring (from the array). Always perform this inspection visually before attempting troubleshooting techniques.
It is HIGHLY RECOMMENDED that the installer initiate RSD (rapid shutdown) so that the panels are disconnected from their strings, and there is no potential for lethal voltage to be present on the DC conductors.
| ✅ Check the tightness of each grounding screw by measuring the torque required to turn them. | |
|
✅ Check system wiring for damage from weather events, abrasions, or critters. Looking for any exposed copper or degradation of the external insulation (vinyl sheathing). Insulation issues can also result from bent or compressed wires (for example: aggressive zip-ties). Make sure all wires are supple and secured correctly (above any puddles). |
|
Did the installer find any wiring issues?
• If NO - The wiring inspection passes, continue to Step 4.
• If YES - Correct faulty wiring issue(s), and proceed to Step 6.
Step 4. Check for water ingress.
This is a tricky procedure, because the moisture that may have caused the fault often evaporates before the installer is on site. To verify this, note the time of day when the error is recorded. If the Error always happens in the morning (but clears by the afternoon), then moisture is most likely the cause. Have the installer look for discoloration or corrosion in the common areas (below).
Check for these indications of moisture ingress:
| ✅ Check for corrosion or staining of the PV module wires or connectors. | 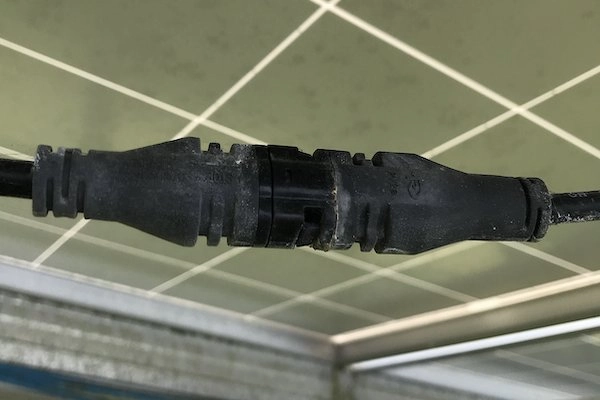 |
| ✅ Check for corrosion or breakage of electrical conduit. | |
|
✅ Check for external breakage or discoloration of the Junction Box.
✅ Open it and check for corrosion and wiring issues inside. |
|
| ✅ Check for moisture or contamination inside the Inverter (especially with outdoor installations) |
Did the installer find evidence of moisture intrusion?
• If NO - Continue to Step 5.
• If YES - Correct the cause of intrusion and then proceed to Step 6.
Step 5. Perform a Megohm (Megger) test.
If the installer has a Megohmmeter, ask them to perform a Megger test on all the modules and the DC wiring, starting with the home runs (see videos at the end of article).
Reference: Megger and Insulation Tests
Did the Megger test find the fault?
• If YES - Continue to Step 6.
• If NO - Contact Tigo Support
Step 6. Perform System Turn On.
- Turn on Battery
- Turn on Inverter DC power switch
- Turn on inverter AC disconnect
Having a hard time? Contact our highly trained and helpful Technical Support Team today!
Related Links:
PV Array Ground Fault Troubleshooting
Videos: